Sometimes, you may not want to disable Windows search indexing. It depends on what hardware you use. Below are some prime examples of when you should or shouldn’t disable it. Also, let’s just dispel a quick myth. Windows search indexing is still used in Windows 10 and it works in much the same way as older versions of Windows. With that in mind, here’s what we suggest: If you have a slow hard drive and a good CPU, it makes more sense to keep your search indexing on, but otherwise it’s best to turn it off. This is especially true for those with SSDs because they can read your files so quickly. For those curious, search indexing doesn’t damage your computer in any way. With it turned on, all searches are indexed so that searches are faster – however, the search indexer uses CPU and RAM, so with it switched off, you will save those resources.
Turn Off Windows Search Indexing Selectively
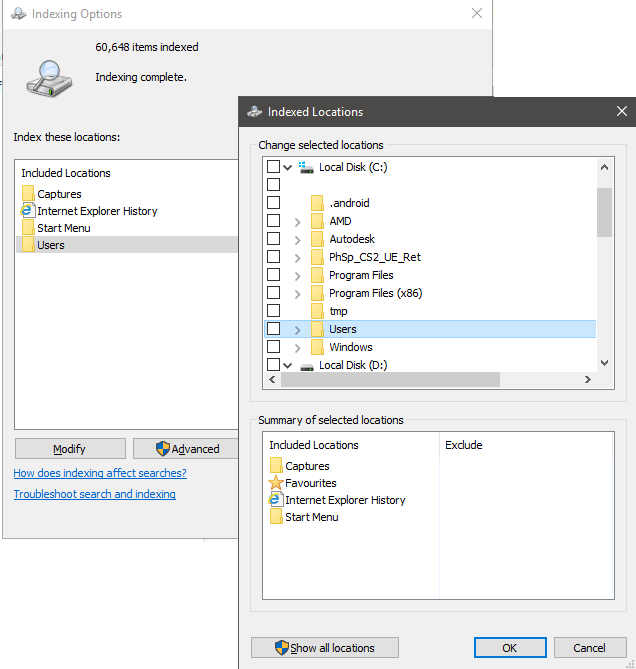
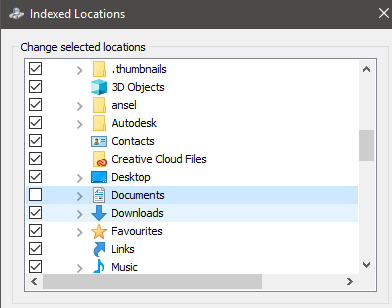
You have the option to turn off indexing for specific folders, so if you regularly search areas on your PC, it may be worth keeping indexing on for those, and disabling it elsewhere. We’ll start with this option because it’s a great middle ground for saving PC resources and fast search speed. To do this, Open the Start menu and type Indexing. Click on Indexing Options. Once in the Indexing Options page, you’ll see a list that shows all included and excluded locations for indexing. This will include your Start Menu, Internet Explorer History, and most importantly, the Users folder and everything inside it. This means everything like your documents, downloads, pictures, and videos folders. These folders could contain a lot of files you rarely look at. If that’s the case, you should choose to turn off indexing. Click Modify, then on the new page, scroll down to the ticked Users folder and untick it. After, click OK. Take note that there may be multiple Users folders, so make sure you find the one that is ticked. You can take it further by clicking the drop down arrow on the Users folder and unticking individual folders. This could be useful, for example, if you visit my documents a lot, but rarely touch the other folders. If you keep adding files to each folder, the indexing will continue, wasting more resources, so it’s best to switch this off for folders you rarely enter to save system resources.
Turn Off Outlook Search Indexing
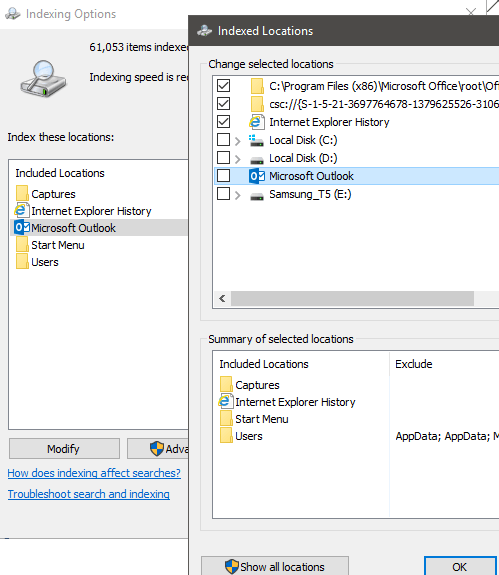
By default, Microsoft Outlook doesn’t appear in the search indexing page. We need to go through Microsoft Outlook instead. So, open Outlook, then click File – Options. In the Options page, click the Search tab on the left and then click on the blue highlighted Indexing Options… button. Next, you’ll see a similar menu to before, but you’ll now see Microsoft Outlook in the list. To turn off Outlook search indexing, first click Microsoft Outlook in the list to highlight it. Next, click Modify and then click the tick box in the new window to untick it. Finally, click OK.
Turn Off Windows Search Indexing For Specific Drives
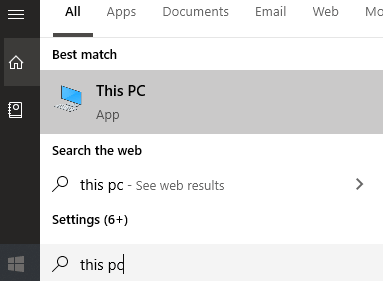
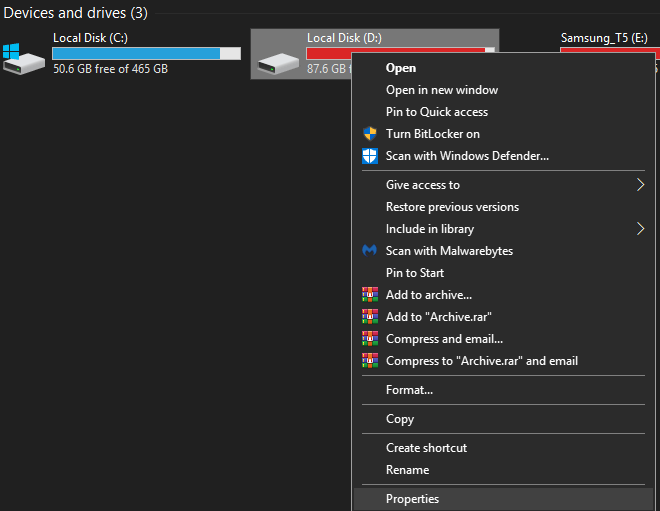
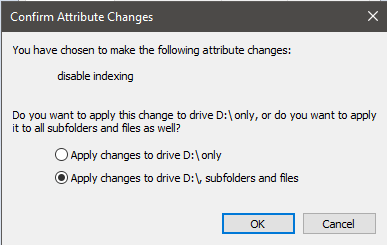
If you want to turn off Windows search indexing for specific drives, you can do so with a different process. It’s recommended to turn off search indexing for drives you rarely touch, for example, backup drives. To do it, first open the Start menu and type PC and click on This PC when it appears in the search results. Next, right click a drive and click Properties. On the General tab, click to uncheck Allow files on this drive to have contents indexed in addition to file properties at the bottom. After, click Apply. You will be given the option to choose all files or just the drive itself. Make sure to select Apply changes to Drive X:, subfolders and files. After, click OK. The next step will take some time. Your PC will now apply this new attribute to every file on that drive. Thankfully, you can let it run in the background and it shouldn’t have a huge impact on your performance, unless you’re applying it to the drive you are using Windows on. If any Access Denied messages appear, just click Ignore All – these are system files or other files that are currently being used.
Completely Disable Indexing
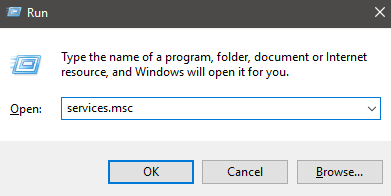
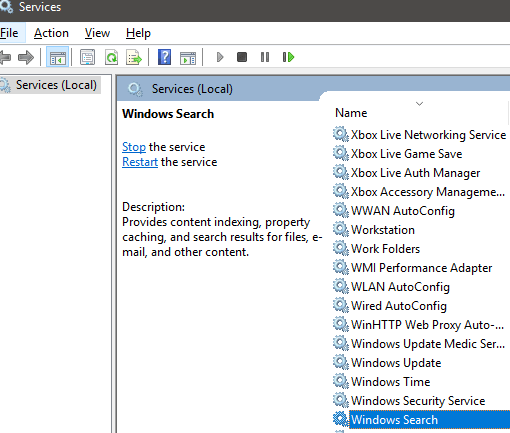
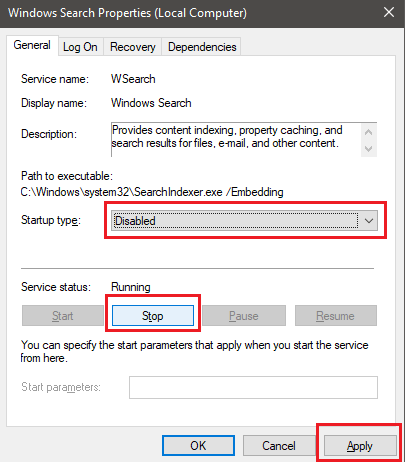
If you want to disable search indexing on Windows 10 completely, you must use another method. The methods above can stop search indexing for specific files and folders, but the search index service is still running. This option is only recommended if Windows search is not working, or your CPU is really slow and running into performance issues. Follow the steps below to disable Windows search. You can start by pressing Windows Key + R, typing services.msc and clicking OK. Look for Windows Search in the list of services. To find it easier, click the Name button twice to organize alphabetically from Z-A. Double click Windows Search when you find it. In the new tab that opens, click Stop to stop the Windows Search indexing service, and then click the Startup type dropdown box. In the list that appears, select Disabled. After, click Apply. You can now restart your PC and Windows Search indexing will be disabled entirely. If you notice any problems with search performance, you can consider turning it back on again.
